|
|
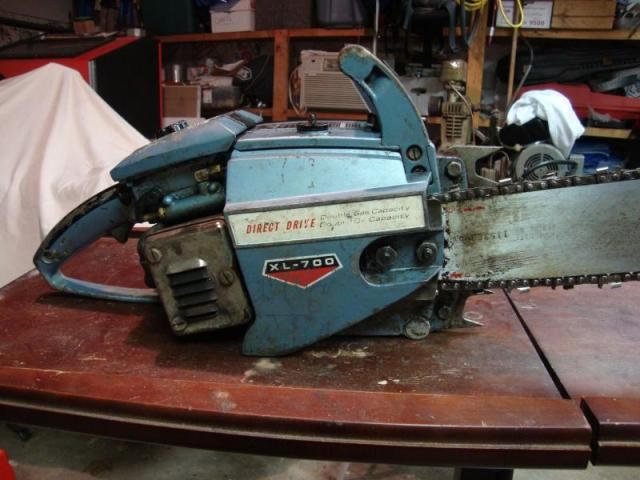
Post by xl130 on Jan 30, 2020 21:07:14 GMT -5
I had the displeasure of having to replace the check valve assemble in my XL-2 carburetor. The model in this Terry built saw is a Walboro HDC 48-A/HDC 48-1. I purchased the rebuild kit(K10-HDC). I noticed that this kit comes with a small screen and retainer clip for the main nozzle. Being curious and trying to be thorough I decided I would just go ahead and replace it...even though it looked fairly clean. This is were that "If it ain't broke don't fix it" quote rings true. I tried to remove that little ring clip with my pick and hook set. That clip is really,really small and very tight. Being stubborn I pushed a bit too hard and slipped. The hook went into the screen and bent the heck out it. So deciding that it was bent I'd just go ahead and stab it with the hook and rip it out. What could be the harm? its already screwed right? Wrong....I should have checked the diagram a bit closer. I didn't realize that there is a very delicate check valve directly below that brass insert until it was too late. I messed around later and was able to remove the clip with a micro screw driver set. Start at the opening of the clip and carefully work it under and lift it out. (Size was 0.9 m/m) I've also read that you can use a stiff pin. So,this is how I removed that valve assembly and replaced it. Please go ahead and point out anything that you would do differently. I had never done this before but this method worked and I got the saw running. The Walboro part number for the check valve assembly is (86-523 Seat Assembly - Check Valve). Relatively inexpensive and available from a supplier on the Walboro website. (Screen removed and check valve flap exposed)  1E0AE7F8-BEE9-44A6-925B-34D19915D1BC 1E0AE7F8-BEE9-44A6-925B-34D19915D1BC by XL 130 Homelite, on Flickr (3/16 drill bit. SLOW...REALLY SLOW!!! One little shot of the trigger is all it took. No pressure)  AE1228A7-2005-407D-AC0C-F2B4F8C201A6 AE1228A7-2005-407D-AC0C-F2B4F8C201A6 by XL 130 Homelite, on Flickr (After drill out. Notice the stuff under that valve that you don't want to hit with that drill bit. Bye bye carburetor)  F4C82869-6D90-4D7E-92E1-2E0DB20CB9F3 F4C82869-6D90-4D7E-92E1-2E0DB20CB9F3 by XL 130 Homelite, on Flickr (Carefully pry out with pokey screw driver thingy)  C25D88AD-2CE0-43CD-BC64-380F7DCDD754 C25D88AD-2CE0-43CD-BC64-380F7DCDD754 by XL 130 Homelite, on Flickr (New Assembly)  05347E0A-316E-4E39-81D3-A310E3C32599 05347E0A-316E-4E39-81D3-A310E3C32599 by XL 130 Homelite, on Flickr (As clean as I could get it with carb cleaner)  2ACB7EC4-9416-486D-B4EF-E2A4E57DA08F 2ACB7EC4-9416-486D-B4EF-E2A4E57DA08F by XL 130 Homelite, on Flickr (New check valve flap in)  1DA6E2F1-DA10-4453-86A9-E2084BF0630F 1DA6E2F1-DA10-4453-86A9-E2084BF0630F by XL 130 Homelite, on Flickr (New assembly with retaining ring and screen) 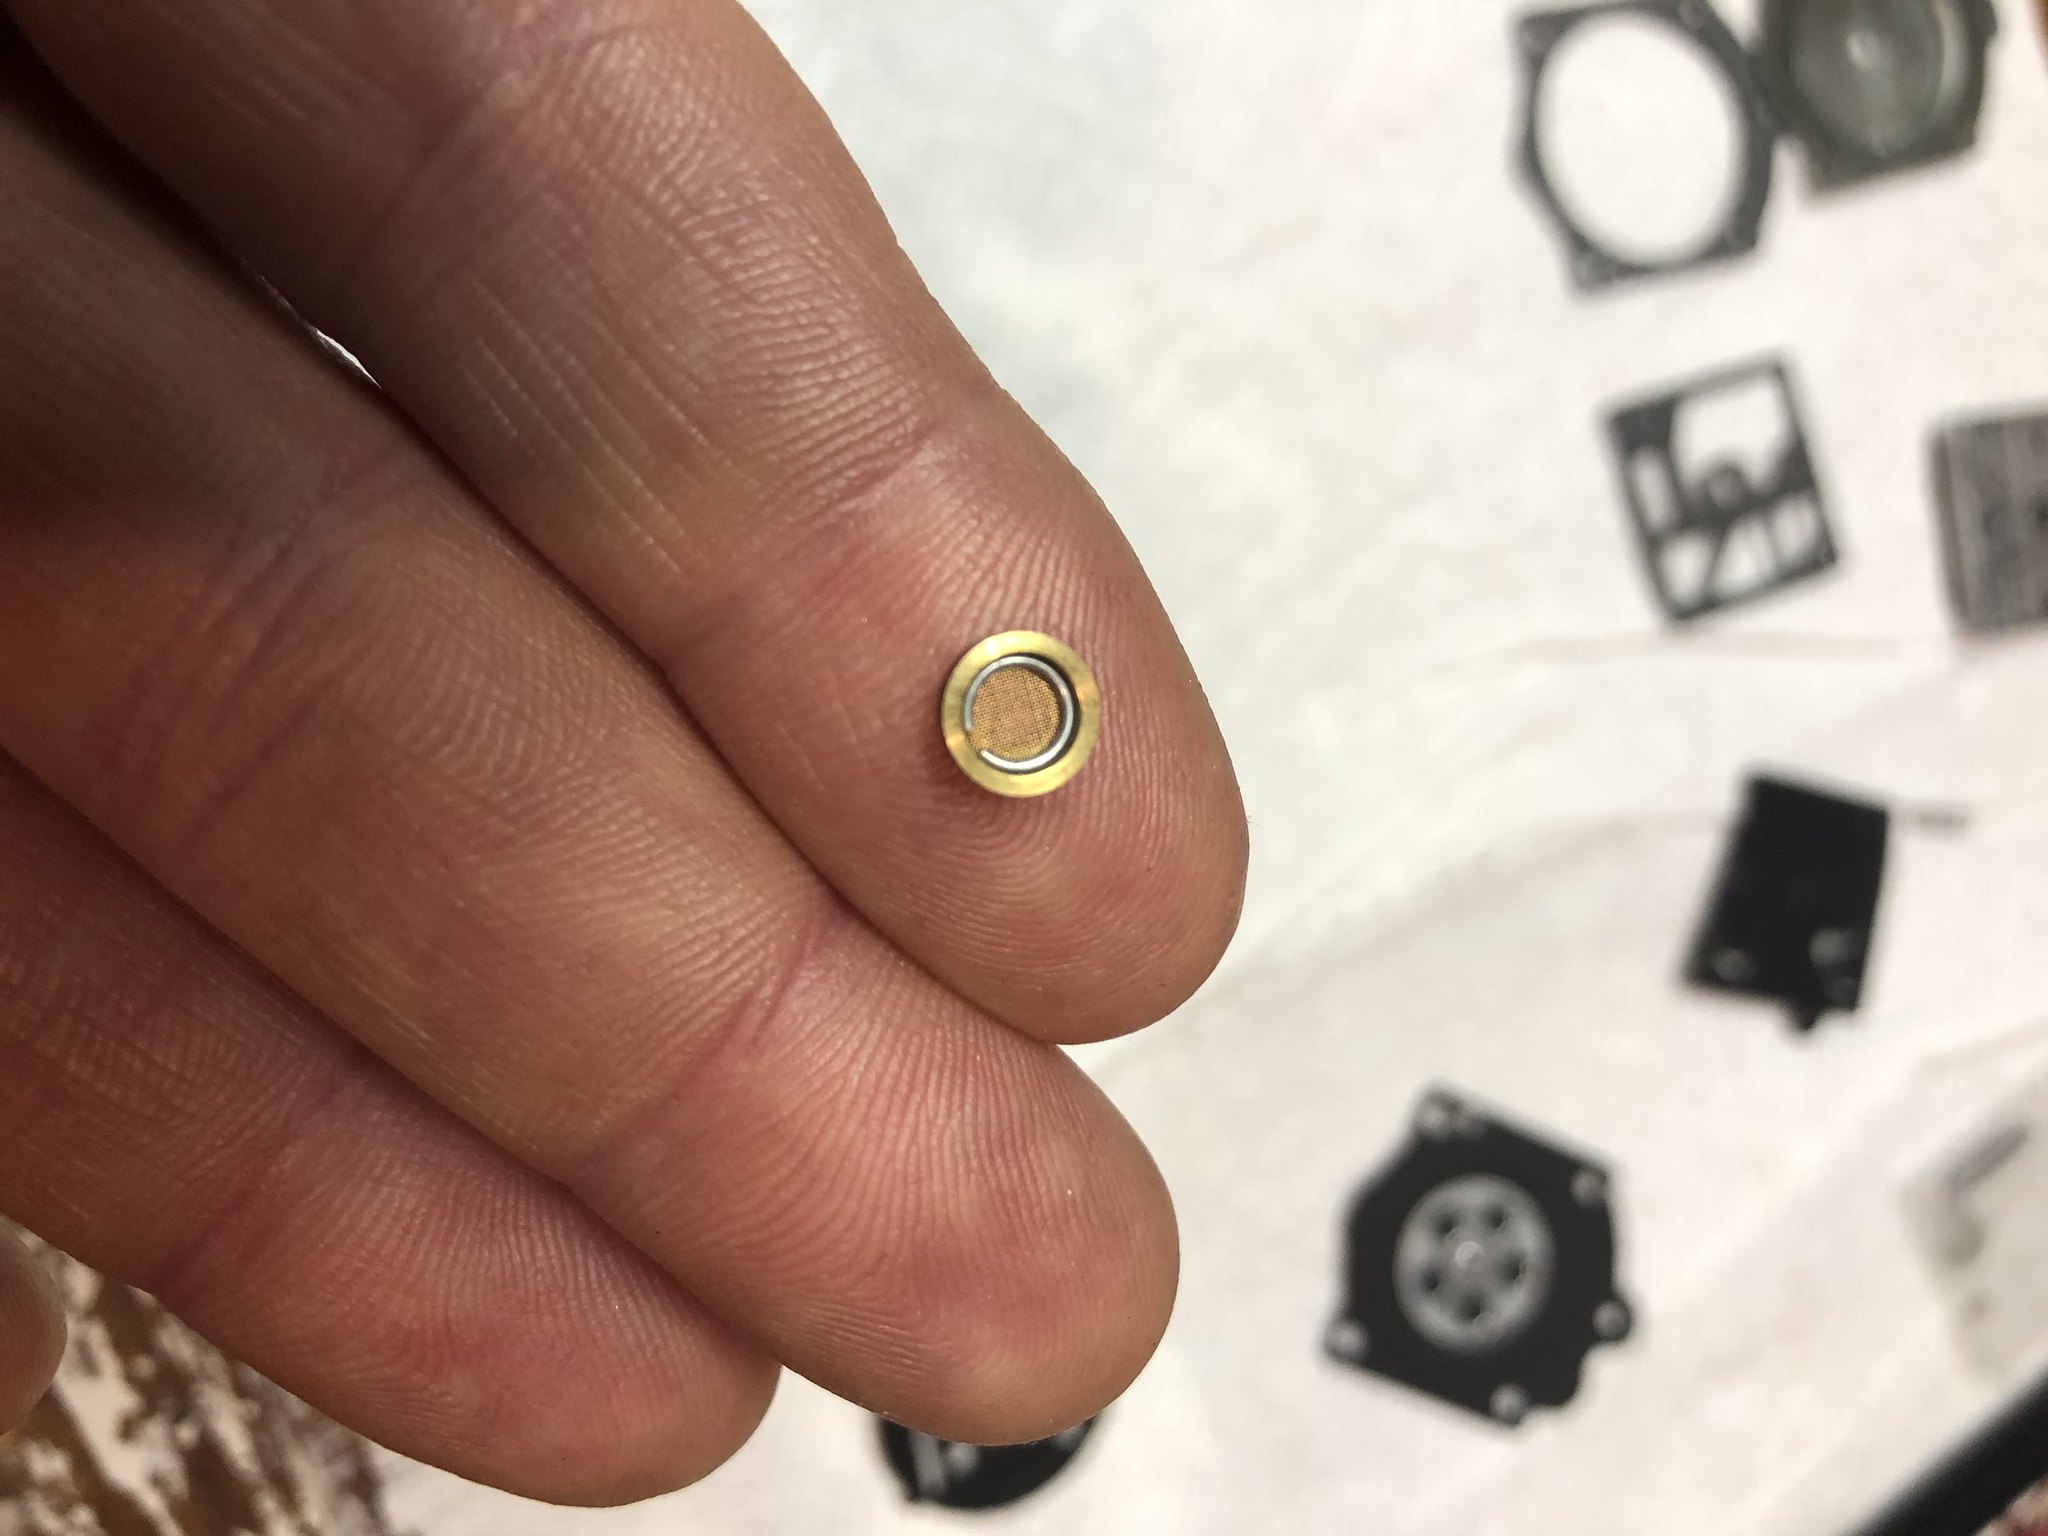 8426A4A2-EA7A-43EB-931E-14A2F20977EF 8426A4A2-EA7A-43EB-931E-14A2F20977EF by XL 130 Homelite, on Flickr (Now the stressful part. Tap it in as straight as possible with a 8 oz ball peen and a 5/16 punch. Tapped it flush with the channels flowing into it)  C16F7A85-03C9-4086-9A57-D2BFA6B6A71C C16F7A85-03C9-4086-9A57-D2BFA6B6A71C by XL 130 Homelite, on Flickr (Final result. After check valve was in I continued with repair kit installations and closed er up. I think a bit bigger punch than 5/16 would have been more suitable)  02547999-A8B7-4CFE-8DF5-F4D022B8149E 02547999-A8B7-4CFE-8DF5-F4D022B8149E by XL 130 Homelite, on Flickr (Glamour shots)  F221D51C-DC19-4B1D-8E60-5FAC55477310 F221D51C-DC19-4B1D-8E60-5FAC55477310 by XL 130 Homelite, on Flickr  EF2BC0A1-E8B1-49A4-8B66-511E4F0C89F7 EF2BC0A1-E8B1-49A4-8B66-511E4F0C89F7 by XL 130 Homelite, on Flickr |
|
|
|
Post by edju1958 on Jan 30, 2020 22:25:16 GMT -5
Nicely done! I've never messed with an HDC check valve & I know that I've got a couple of carbs that need to have this done,but unfortunately my eyesight is so poor that I don't think I could do it.I'm having a helluva a time with setting points now. Ed
|
|
|
|
Post by rowdy235 on Jan 30, 2020 22:40:48 GMT -5
Like Ed, I've torn dozens of HDCs down but never messed with the check valve, and from the looks of it, unless I have to, I won't be anytime soon!
Great job!
|
|
|
|
Post by xl130 on Jan 30, 2020 22:43:58 GMT -5
Yeah. I actually looked around for a new carburetor but I just couldn’t justify the cost of a new or used one vs. trying to do this first. I am not in any hurry to do it again anytime soon.
|
|
|
|
Post by onlyhomelites on Jan 31, 2020 8:23:12 GMT -5
Nicely done! I just recently covered the valve replacement in one of my Youtube videos. A low percentage of the carburetors I work on need them, but I always check when I'm doing a rebuild. With a sharp pick, I've gotten good at prying that retainer clip out so I can see the valve itself. If it is flat and not gooey, I leave it alone. But if it is distorted or deteriorated, it gets replaced. A bad check valve makes a carburetor impossible to tune.
|
|
|
|
Post by xl130 on Jan 31, 2020 8:40:59 GMT -5
I wish I had seen your video before attempting this little job. I’ll look for that to see what I could have done differently. It was tedious and I got lucky that I didn’t cause more harm than good. This whole job was completely unnecessary for my carb. I suppose it’s similar to needlessly removing Welch plugs.
Big lesson for me was get the right tool for the job when trying to remove small retaining rings. And don’t fix something that isn’t broke.
|
|
|
|
Post by riseandrun on Jan 31, 2020 13:49:50 GMT -5
Impressive! and bottom line you got the saw running. And taught us novices a new lesson. Thanks!
|
|
|
|
Post by ettrick on Jan 31, 2020 21:51:20 GMT -5
Do most walbro's have this check valve or just this particular one?
|
|
|
|
Post by edju1958 on Jan 31, 2020 22:18:51 GMT -5
Do most walbro's have this check valve or just this particular one? Dan,I did a search on where to buy them & Feebay is the most expensive,double the price or more of other places.To answer your question,yes,most Walbro carbs do have that check valve,but they might have different part #'s.The HDC,SDC,& HDB carbs all use the same part # - 86-523,according to the places that sell them. Ed
|
|
|
|
Post by ettrick on Feb 1, 2020 12:34:06 GMT -5
What would be the symptoms of an engine running if this was going bad or bad completely? I have lots of walbro's on my john deere snowmobiles and homelites.
Dan
|
|
|
|
Post by xl130 on Feb 1, 2020 16:22:38 GMT -5
I’m really not sure to be honest. The only reason I even changed mine out is because I was clumsy and damaged it while attempting to remove the screen from it. I looked at the operation diagrams to try and understand it’s function a bit better. Now I’m no service technician or carburetor expert but for sure a check valve is meant to restrict the direction of flow in one direction or the other. It looks like this part of the carburetor is allowing flow of fuel during start up and full throttle stages. So I guess you may be running too rich all the time if this valve is deteriorating. Or on the other hand it may allow air to enter the closed system? This is totally a guess and more of a question. Not what you’re looking for but best I got. Maybe one of the more knowledgeable people here can clear this up. www.walbro.com/wp-content/uploads/2016/01/HDCseries.pdf |
|
|
|
Post by xl130 on Feb 1, 2020 20:53:11 GMT -5
Nicely done! I just recently covered the valve replacement in one of my Youtube videos. A low percentage of the carburetors I work on need them, but I always check when I'm doing a rebuild. With a sharp pick, I've gotten good at prying that retainer clip out so I can see the valve itself. If it is flat and not gooey, I leave it alone. But if it is distorted or deteriorated, it gets replaced. A bad check valve makes a carburetor impossible to tune. I just watched your video. Geez you made that look easy. Popping the seat assembly out with a hook looks a lot safer than using a drill!! |
|
|
|
Post by ettrick on Feb 1, 2020 21:25:51 GMT -5
Thanks! This must be the high speed governor type valve that restricts rpm's? I think the xl-925's i have are supposed to have this in them.
Dan
|
|
|
|
Post by sweepleader on Feb 2, 2020 7:21:02 GMT -5
Well, this is guess work so bear that in mind:
The check valve would prevent air from being drawn into the fuel passages through the main jet when the engine is idling.
When the throttle is opened, the main goes from relatively high atmospheric pressure to reduced venturi pressure and the valve moves away from the screen and retainer (the seat of the check) to allow fuel around the edge of the valve disc to the main jet. The 4 bumps in the bottom of the valve space hold the disc off the main jet passage and allow flow when the disc moves in that direction. If it was not there or not working, air could be drawn into the fuel passages through the main jet by idle vacuum on the idle fuel port. That would result in upsetting the idle mix and making a stumble all but certain as main fuel flow was being established on acceleration. The main would have to suck an air bubble out of the passage before it got fuel.
Anyway, that is what it looks like to me, from the diagram posted above. Great diagrams but you have to guess a little because they do not include every detail and the parts are shown schematically, not in correct real world relation to each other.
Anyone who knows for sure, please correct this guess.
This is different from what is in a float carb as both main and idle draw fuel from below the fuel level established by the float in the bowl. The fuel itself performs this function in that kind of carb, keeping the passages mostly full. An accelerator pump allows time for the main flow to be established, like they used to do when cars had carbs but the pumps have long disappeared on chainsaws. With the chainsaw situation needing all position operations, the float went away. A single source (the pump chamber and pump pressure) for both idle and main meant something was needed to help with the stumble.
I wonder how carbs without this check handle this problem. Now they have fuel injection and the problems are programed away.
|
|
|
|
Post by onlyhomelites on Feb 2, 2020 8:55:12 GMT -5
You gotta watch Sweepleader, he's a wily one...and he happens to be right! With the way the fuel circuit is designed on these carbs, without that check valve operating properly, engine pulses can feedback through into the low speed circuit. It creates all sorts of tuning problems. Usually the old valve is still there and "sorta" doing something. The bad part is it never does the same thing twice. So you end up tuning the saw at idle and you think it's all good. Then a rev or two later it's all messed up again. A bad check valve can have you questioning your work on another part of the carburetor rebuild, the reed, all sorts of stuff! That's why I feel it's worth the few minutes to pull the screen and take a peak at it.
XL130: I've tried the drill and screw method previously and found myself perilously close to damaging the carburetor body. That's why I went another route and found a blunt tool that hooks that seat well enough to pop it out every time.
Ettrick: The governor on a XL-925 is a different beast. It operates on similar principles, but it's a screw in brass assembly that has a spring loaded ball and seat. When the engine pulse reaches a certain intensity, the ball unseats and opens a fuel passage that dumps into the main nozzle. You'll find this assembly screwed in on the muffler side of the carburetor, about mid-body.
|
|
|
|
Post by ettrick on Feb 2, 2020 9:24:31 GMT -5
Great information! So this disc is loose in there and only air pressure change from moving throttle past fuel ports in venturi moves it one way or the other?
Dan
|
|
|
|
Post by onlyhomelites on Feb 2, 2020 10:07:42 GMT -5
When it's working correctly!
|
|
|
|
Post by sweepleader on Feb 2, 2020 19:32:54 GMT -5
Well, it's not just air pressure by itself. The air and fuel pressure difference moves the fuel and the fuel drags the disc along. There should only be fuel behind the disc, in the direction of the fuel pump. The fuel has pump pressure on it but the manifold pressure at the idle port would be very low, much lower than in the rest of the intake tract. The air is moving very fast right there, around the edge of the throttle plate so its pressure is quite low. Fuel pump pressure apparently is not enough to overcome that difference, thus the need for the check valve. There are several "idle" fuel ports to ease the transition from idle to main fuel flow. Switching from the idle port to the main port requires some time to get the main fuel flowing, those extra ports provide that time and fuel. Once the main port is flowing, the idle flow stops because there is no vacuum there anymore. There is likely a little drippage from the idle ports due to fuel pump pressure but it likely does not compare to the flow at the main port.
I repeat that this is guesswork based on my prior knowledge of automotive carbs. These are quite different but "ya canna change the laws of physics", so I am pretty sure this is right.
|
|
|
|
Post by xl130 on Feb 2, 2020 19:59:05 GMT -5
I was with you for about the first sentence....then I starting picturing monkeys chasing their tails and I was lost. I’m sure what you said makes sense to someone though  |
|
|
|
Post by ettrick on Feb 2, 2020 21:41:26 GMT -5
I enjoy learning and carburetors are very interesting to figure out. The small diagrams of fuel air flow make it harder for me to see whats happening. I have seen a lot of different carbs and can usually figure them out after sitting down and thinking them over a while.
Dan
|
|