Deleted
Deleted Member
Posts: 0
|
Post by Deleted on Dec 21, 2017 22:50:49 GMT -5
It started as an ignition repair, and well, you guys know how that goes. The saw is a great saw, in great shape for it age, it needs a muffler shield or to have someone rebuild it, but other than that its complete. I ordered a coil, points, condenser, and felt seal for the ignition side, along with a new new plug and plug wire. The clutch side needed a new .404 hub and drum and I also ordered new thrust washers. I have most of the painted surfaces cleaned, degreased, sanded, and thoroughly cleaned again with a strong caustic solution. I'm going to start with a light coat of etching primer followed by some spot putty on a few nicks and then sand and spray two light coats of sandable/filler primer and sand again. I may use Hi-Aliphatic Polyurethane, but it will depend on if I can get water slide decals or if Chainsawr will even sell them to me after our disagreement, If not, I'll have them custom made. I'll post some pictures of the repair and prep work tomorrow. It's supposed to be cold here for a few days, lows near 30 and highs of only mid 40's for a few days, put I can heat the parts with my heat gun before I paint and it wont make any difference. 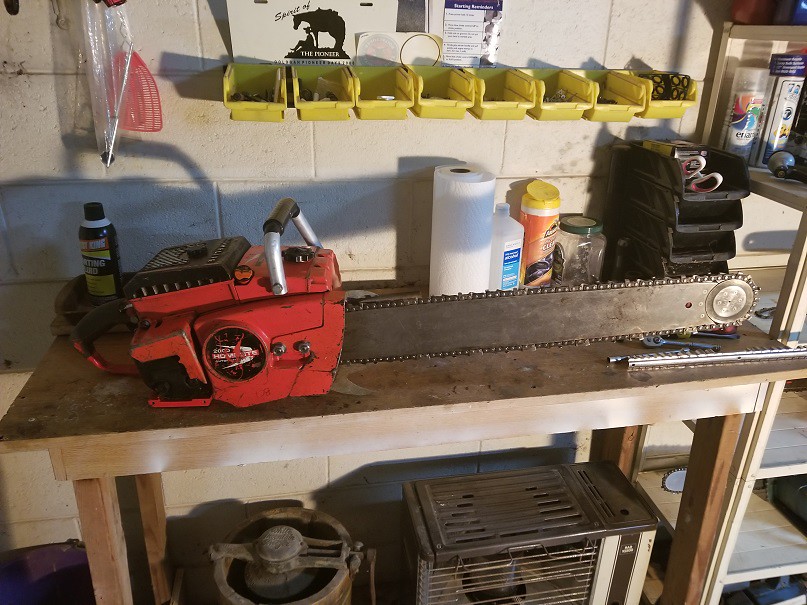 20171120_202714 20171120_202714 by Al Michaels, on Flickr 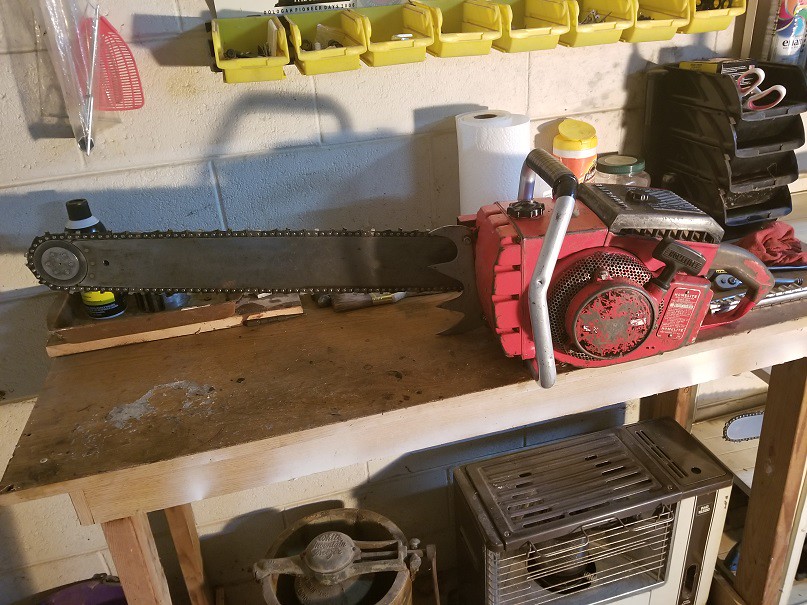 20171120_202439 20171120_202439 by Al Michaels, on Flickr |
|
|
|
Post by Clasec on Dec 21, 2017 23:09:39 GMT -5
I was expecting to see a little 200 Classic. What a pleasant surprise to see this instead.
|
|
|
|
Post by sweepleader on Dec 22, 2017 7:34:33 GMT -5
Very nice, maybe someone else could buy the decals for you...
|
|
Deleted
Deleted Member
Posts: 0
|
Post by Deleted on Dec 22, 2017 7:48:04 GMT -5
Very nice, maybe someone else could buy the decals for you... Thanks, I know a gal down here that creates all kind of decals for tractors. If they don't want to sell them to me I don't think I want my money going to them anyway. |
|
|
|
Post by onlyhomelites on Dec 22, 2017 9:28:44 GMT -5
Well you can skip the middle-man (chainsawr) and contact the gentleman that makes them directly: scsupply@gmail.com
He can be a bit slow on email responses, especially this time of year, but I've found Joe to be very pleasant and easy to work with.
|
|
|
|
Post by tjthechainsawmech on Dec 22, 2017 10:54:28 GMT -5
I'm jealous lol Nice find!
|
|
Deleted
Deleted Member
Posts: 0
|
Post by Deleted on Dec 22, 2017 11:09:47 GMT -5
Well you can skip the middle-man (chainsawr) and contact the gentleman that makes them directly: scsupply@gmail.com He can be a bit slow on email responses, especially this time of year, but I've found Joe to be very pleasant and easy to work with. Yep, I emailed him yesterday, thanks |
|
Deleted
Deleted Member
Posts: 0
|
Post by Deleted on Dec 22, 2017 11:10:31 GMT -5
I'm jealous lol Nice find! Wait till you see my next three saws coming in the mail. |
|
Deleted
Deleted Member
Posts: 0
|
Post by Deleted on Dec 22, 2017 18:05:48 GMT -5
The cleaning and sanding process: I use carb/choke cleaner and brake clear to remove what can't be cleaned with a small toothbrush, it cleans even burnt on dirt/grease/sawdust. After I get them clean (for the moment) I rough sand them and identify gouges and defects in the metal. There are two areas I am concerned about on this saw, the small half moon shape on the air box and the dent in the bottom case. I don't know if the air box was broken or if it is supposed to be that way. I also am in a quandary as what to do about the dent in the bottom case. after rough sanding I'll use a medium grit (150) paper and follow up with a tri-sodium phosphate wash (powdered TSP) that will remove dust in the metal and any loose paint. Next will be a light coat of etching primer, followed by spot body filler in scratches and gouges. After spot putty dries I'll sand and prime again then use a 220 grit paper and/or a sponge pad (soft sponge on one side, fine emery cloth on the other), and reprime any burnished/bare areas. 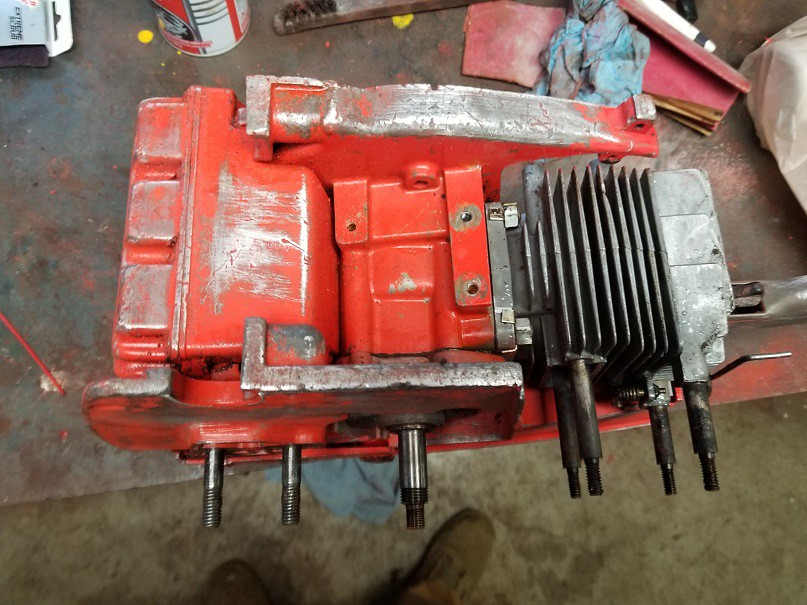 20171222_155255 20171222_155255 by Al Michaels, on Flickr 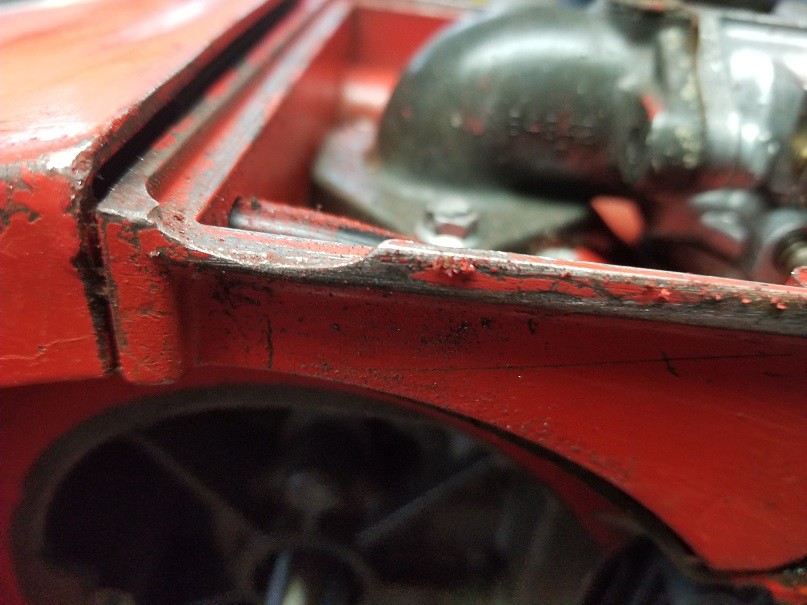 20171222_155439 20171222_155439 by Al Michaels, on Flickr 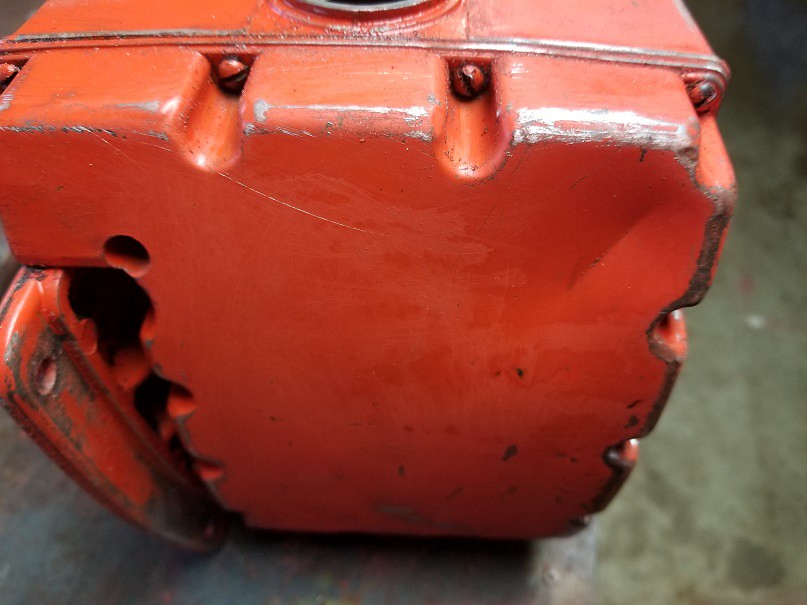 20171222_155453 20171222_155453 by Al Michaels, on Flickr 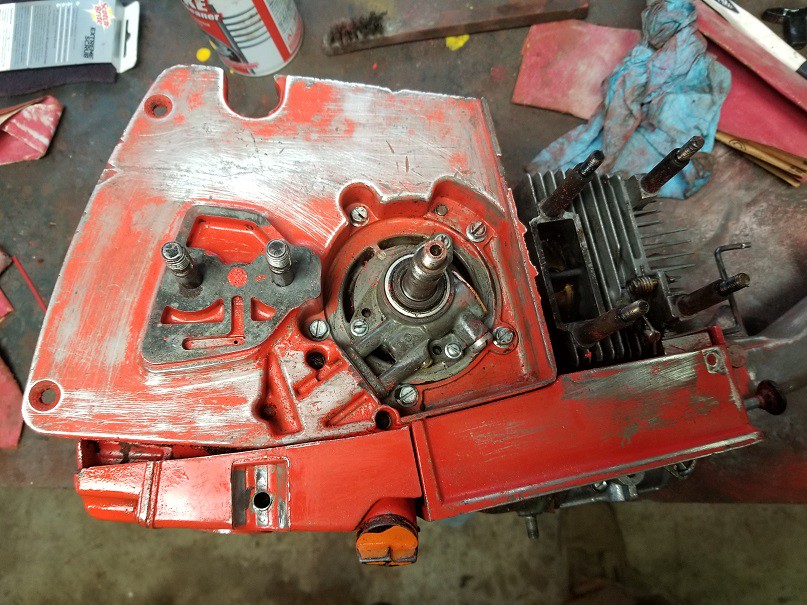 20171222_155244 20171222_155244 by Al Michaels, on Flickr  20171222_155324 20171222_155324 by Al Michaels, on Flickr www.flickr.com/photos/153595070@N02/albums/72157691352992895 |
|
|
|
Post by tjthechainsawmech on Dec 22, 2017 20:27:38 GMT -5
|
|
Deleted
Deleted Member
Posts: 0
|
Post by Deleted on Dec 22, 2017 21:31:33 GMT -5
Excited to see the next 3! Just picked up a 2100 super speaking of 2000 series.  I'm trying to decide what to do about the dent in the tank cover and still looking for a muffler shield, Love to see the 2100 |
|
|
|
Post by sweepleader on Dec 23, 2017 11:51:07 GMT -5
I'm trying to decide what to do about the dent in the tank cover and still looking for a muffler shield, Love to see the 2100 I would be inclined to use epoxy on that dent, in case there is a leak from the inside that cannot be seen. Spot putty or body filler would not stop the leak. I guess if you Redkote the inside the point is moot. Epoxy might be hard to work down flat. |
|
Deleted
Deleted Member
Posts: 0
|
Post by Deleted on Dec 23, 2017 12:26:15 GMT -5
I would be inclined to use epoxy on that dent, in case there is a leak from the inside that cannot be seen. Spot putty or body filler would not stop the leak. I guess if you Redkote the inside the point is moot. Epoxy might be hard to work down flat. I may buy a new tank cover if I can get a gasket. I'm still wondering about the half moon divot on the air box, any ideas if this is broken or factory? If its broken I'll probably use JB weld. |
|
|
|
Post by sweepleader on Dec 23, 2017 13:26:09 GMT -5
Someone must have one of these things to look at. The picture looks like a break on the left end but the angle is not great. Is there paint in the bottom of the U? Does the surface look smooth/molded or rough/broken? Like I said, someone must have one to look at.
|
|
Deleted
Deleted Member
Posts: 0
|
Post by Deleted on Dec 23, 2017 14:05:56 GMT -5
Someone must have one of these things to look at. The picture looks like a break on the left end but the angle is not great. Is there paint in the bottom of the U? Does the surface look smooth/molded or rough/broken? Like I said, someone must have one to look at. Its very smooth, doesn't look like a break, but I'm almost sure it is. |
|
|
|
Post by sawnami on Dec 23, 2017 14:29:54 GMT -5
|
|
|
|
Post by sweepleader on Dec 23, 2017 14:34:46 GMT -5
Sawnami has 3!! Nice!
Guess that nails it, not supposed to be there. (That notice brought to you by Captain Obvious.)
|
|
|
|
Post by undee70ss on Dec 23, 2017 17:42:35 GMT -5
Here’s my 2000 and it doesn’t have that half moon divot.  Hey, I got 3 also!!!  |
|
Deleted
Deleted Member
Posts: 0
|
Post by Deleted on Dec 23, 2017 18:56:08 GMT -5
Do you guys think JB weld would be the right way to patch it or is there something else better? It looks like it might have been dropped and the air filter cover caused the break, it may have happened at the same time as the cover was damaged.
|
|
|
|
Post by undee70ss on Dec 23, 2017 19:02:45 GMT -5
Do you guys think JB weld would be the right way to patch it or is there something else better? It looks like it might have been dropped and the air filter cover caused the break, it may have happened at the same time as the cover was damaged. The best way would be to build up the area with a tig welder and machine it smooth. I currently don't have a tig welder so JB would be the 2nd best option. Just be sure to do proper prep, could probably use a dremel to machine the JB to the proper dimensions. |
|


