

Post by spook50 on Dec 2, 2013 10:28:08 GMT -5
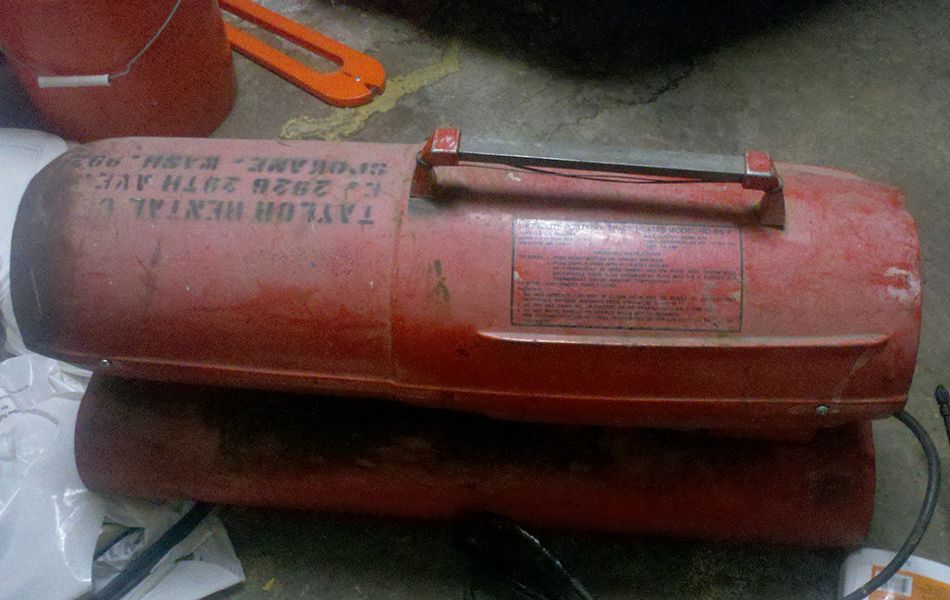
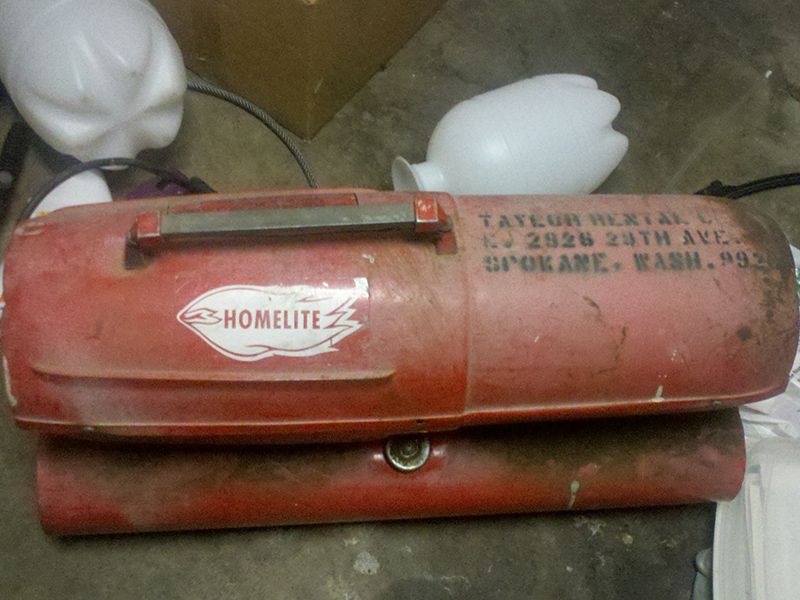
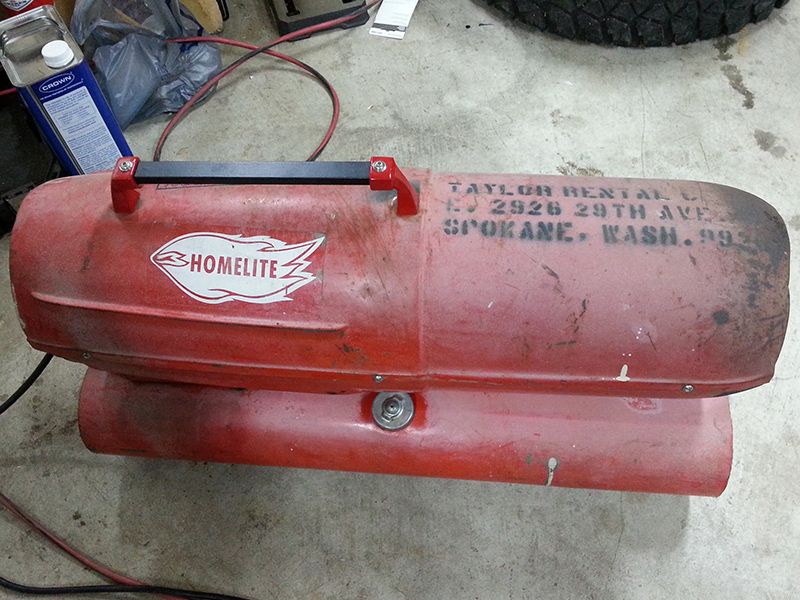
Thought some of you Homelite collectors might have an interest in this. I needed some sort of heat source for my shop so fall of last year I found a torpedo heater on Craigslist for $60. Went and picked it up, dude plugged it in to show it still worked (even left about 3 or so gallons of kero in the tank) and I brought it home and had an "in a pinch" heat source. I had just started taking apart my 150A and realized that the heater was also a Homelite. Looked old enough I wondered if it was possibly from the same era. A Google search came up with absolutely nothing though. It was almost as if this model never existed. It had definitely seen plenty of abuse throughout its life too.
Notice the bailing wire tied to the ends of the handle. The rod just slipped into the ends but because of the heater's weight, the sheet metal shroud would flex and the rod would pop right out. Also the screws holding the upper shroud half onto the lower were mismatched sheet metal screws that barely held the halves together.
Dusty, nasty, and I didn't get a decent pic, but alot of the wiring inside was beat up badly, with exposed strands and chafed insulation. The cord itself was nearly half wrapped with old gummy electrical tape. At a glance I counted half a dozen chafed/exposed spots, along with the ground pin missing from the plug. Had I known it was this bad (with the exception of the missing ground pin) I wouldn't have used it through last Winter. Yeek. The intake filter was barely hanging on too.
It ran fine while I used it. Got curious and tried a couple gallons of ULSD in it to see how the odor would be compared to the kero. BLARGH. Horrid. The kero was unpleasant enough, and I found what was most tolerable was the Klean Heat kero alternative that Klean Strip makes.
This year when the weather started cooling off I took the opportunity to clean up the heater and fix the gnarly wiring. I figured while it's apart it'd be wise to go ahead and overhaul it and fix anything else that might be bad.
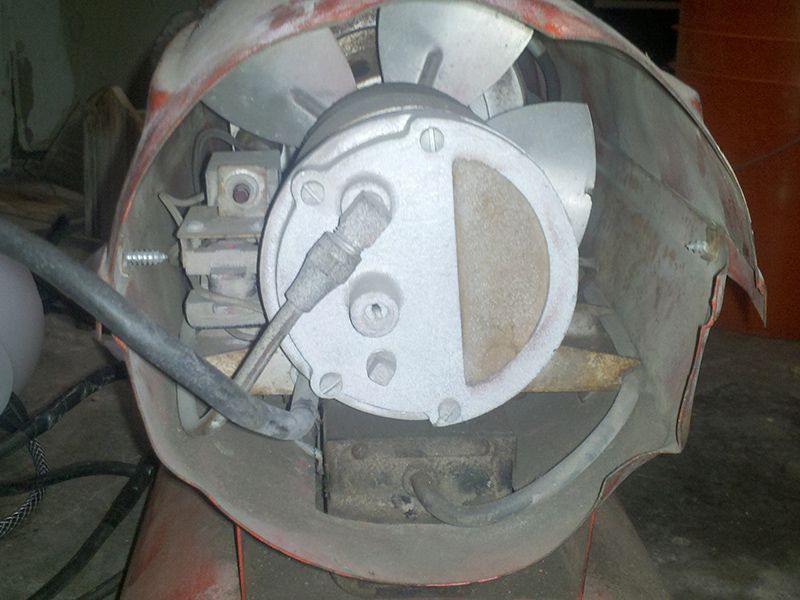
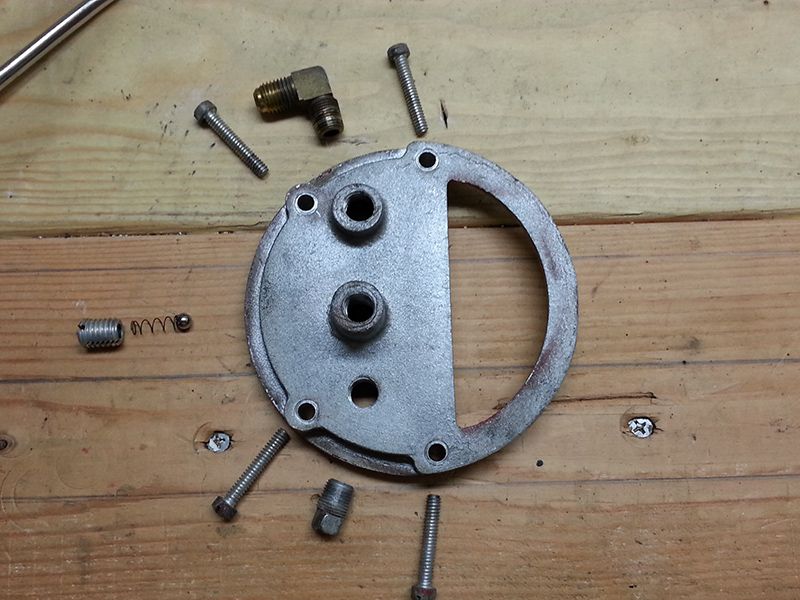
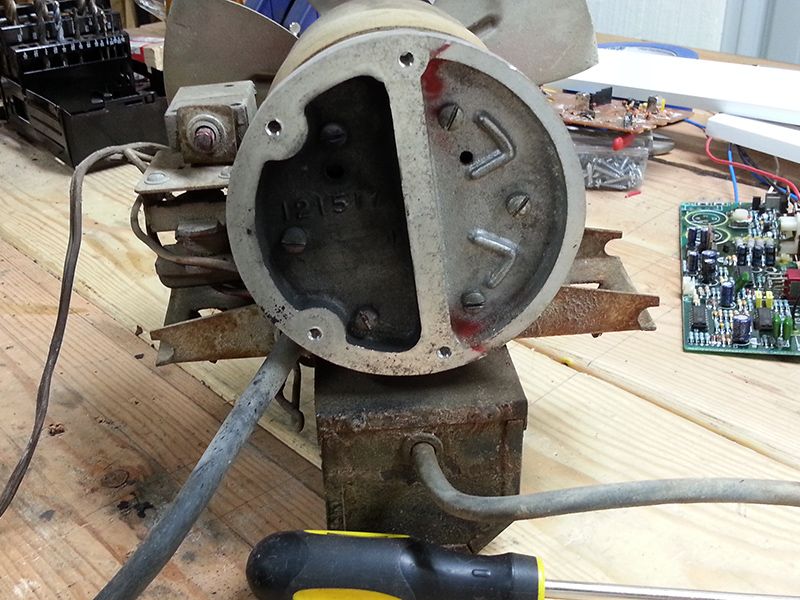
The rear cover plate after cleaning. No clue what the purpose of the drain plug is. The adjusting screw I found out controls the air going through the fuel pickup siphon, controlling the mixture. It was cranked down hard with solid buildup underneath and all gummed up with old thread sealer. The brass fitting is where the air is pumped out through the system to the fuel siphon.
Underneath the cover plate. Turned out all that black buildup was just dust from the rotor vanes in the air pump. Quick scrub in my solvent tank cleaned it right up.
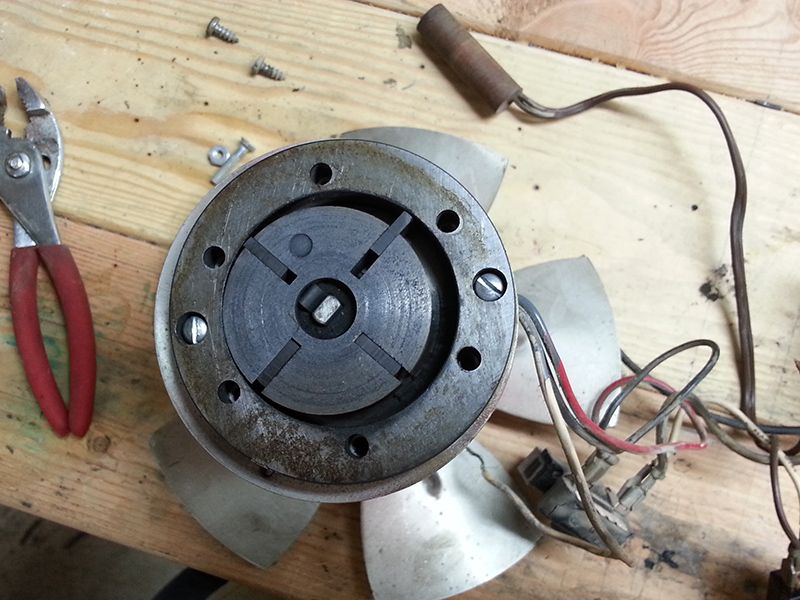
The rotor and stator vanes. There was lots of tightly packed dust built up in here. The rotor itself was only held in by a spring clip so I was able to clean that in the tank. Vanes got hand cleaned with a solvent-soaked rag and the inside of the housing/ring got cleaned out with rags and Q tips. Curious what pressure and overall CFM this little guy pushes through the siphon.
The rear plate cleaned up and reassembled. The filter that was there crumbled to dust in my hand, so I got a pair of Scotch Brite pads and cut them to match the filter enclosure. The thickness of the two pads was a perfect fit for the intake. Probably filters better than the old element too

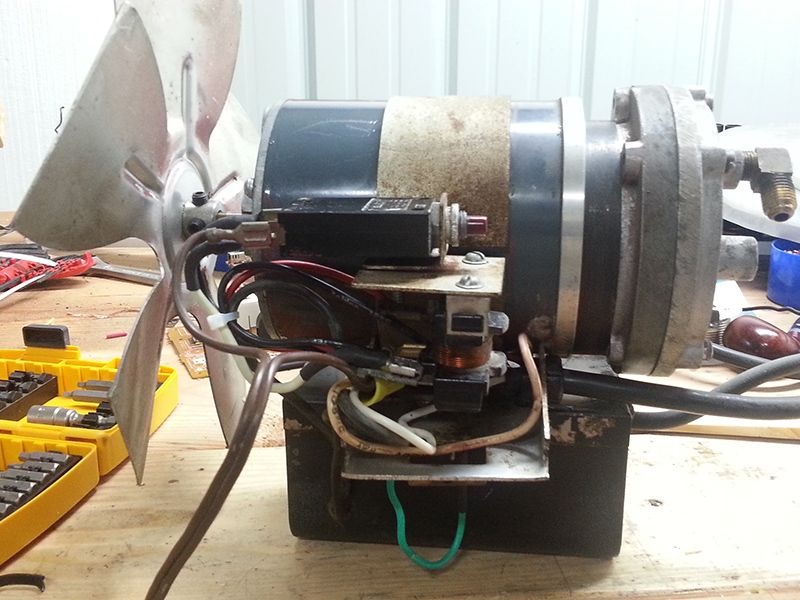
The motor/pump/fan/ignition assembly cleaned up, rewired and reassembled. Pretty much everything got hand cleaned either in the solvent tank or with several healthy blasts of electrical contact cleaner.
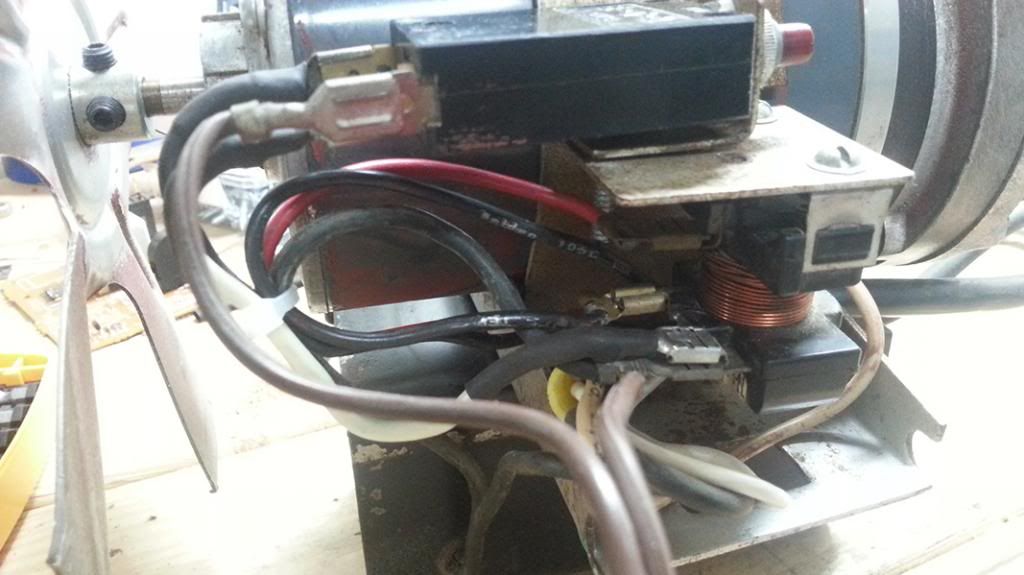
Closer pic of the wiring. A lot of it just got replaced. Luckily I have a bunch of old 16AWG cords with ground leads so I was able to easily replace the old beat up one.
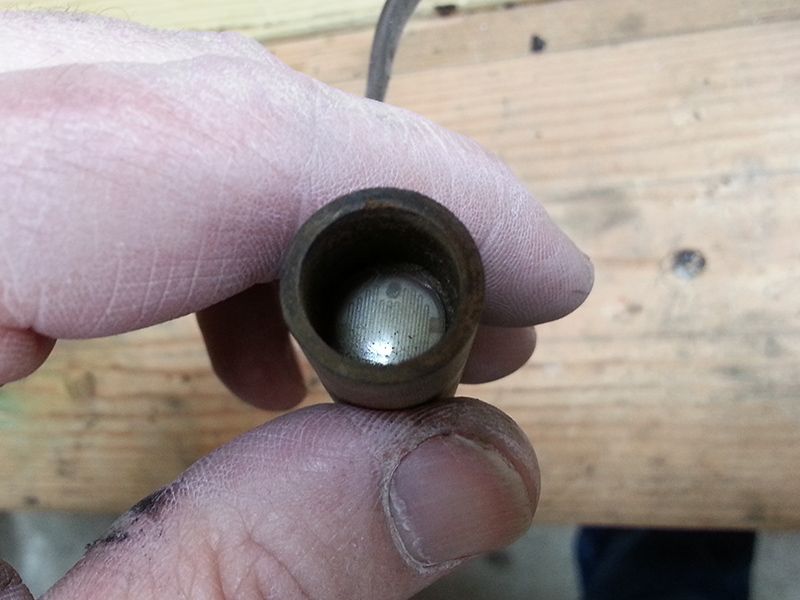
I thought this was kind of interesting on an older heater. I would expect a new one to use a safety mechanism, but was surprised to see one on an old unit. From what I can tell by the way it's wired, this photoresistor (which mounts on the back of the combustion chamber facing the flame) continually drops its resistance if there isn't constant exposure to light, which allows more and more current to pass through the breaker until it pops. Not bad to prevent flooding of the chamber if the flame happens to go out (only had that happen when it's run out of fuel, both before and after overhauling it).
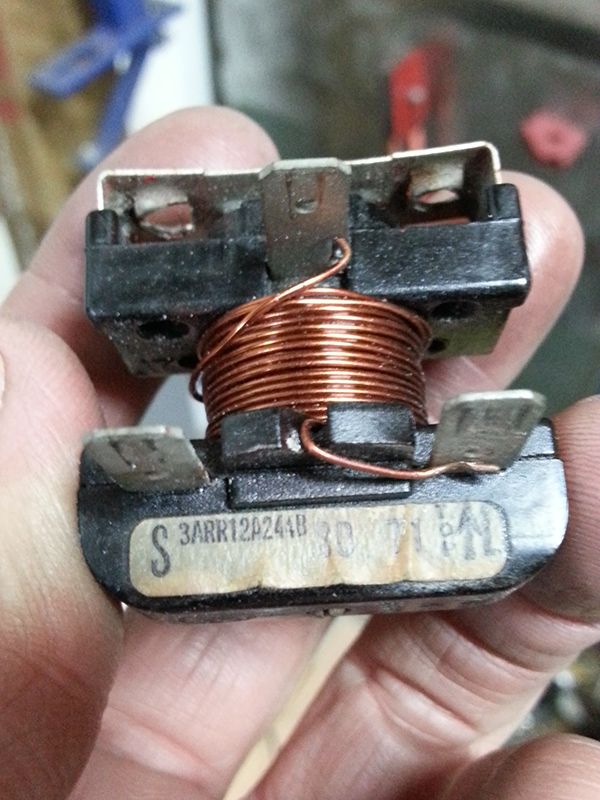
Start relay for the motor. First time I had seen one like this, but apparently this style isn't uncommon. It was caked with dust and greasy crud, so it ended up getting almost half a can of contact cleaner.
Heater reassembled after cleanup. I put a couple large fender washers under the handle ends and used a couple screws with acorn nuts to secure them to the bar. Solid as a rock now. Since they were small enough to fit in my toaster oven I painted and baked them. The shroud halves and tank will likely be done in the Summer. The weather was cooling off fast here and I didn't have time to wait for a good cure without the help of an oven.
Nice & toasty! Before overhauling it, the nose of the combustion chamber wouldn't glow at all. I didn't realize just how much heat this could crank out (can't really tell BTUs by feel) until I got it all cleaned up and got the mixture dialed in right. I also gave the strainer screen in the fuel pickup a good cleaning since it was nearly completely clogged with little bit of gunk and rust. Looks like next Summer I'll be flushing out the tank with some muriatic acid and putting some sort of coating material in it. But with everything clean and tuned up it works FAR better now. A little quieter, NO more stink with kero, lights off instantly now and of course, I'm getting a lot more heat output for the fuel used.
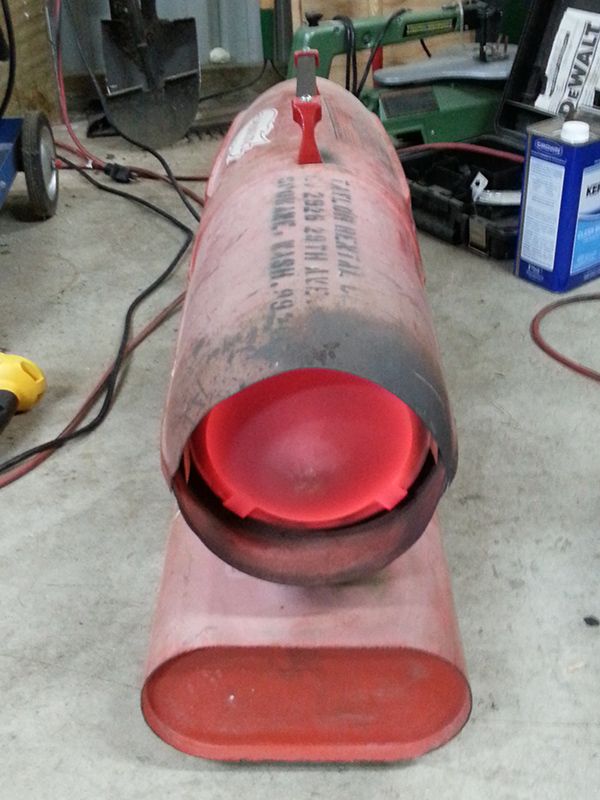
I had a couple gallons of WVO that I had been starting to save up for a waste oil heater project that got 86'd in favor of a rocket stove, so I got curious and mixed some into a few gallons of kero at an 80:20 ratio. Worked great and made my shop smell like fried chicken (I certainly wasn't complaining), but after running just less than a full tank (five gallons) of the mixture through, the heater was having trouble lighting. I still had between a quart and half a gallon in the tank so I pulled the upper shroud and took a look into the combustion chamber and it looked like the nozzle was having trouble getting a constant mixture of air & fuel through. So I pulled the chamber, cleaned out the nozzle and put a couple gallons of diesel (all I had handy) in to further dilute down the WVO in the mixture. It's working great again, and even though the smell was still noticeable it was FAR less noxious than before the overhaul. With the addition of a couple ounces of isopropyl alcohol per gallon of diesel to lower the flashpoint a bit and get a more complete burn, it was actually better than even the Klean Heat kero was burning before the overhaul. I might give a couple gallons of pure diesel a try again with the alcohol added and see how that does. If I don't like it, at least now I know that I can go back to the (expensive) Klean Heat kero and have no noticeable smell at all.
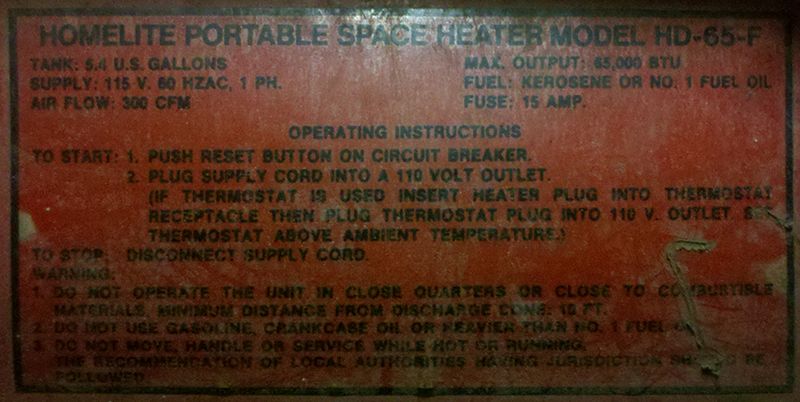
In case any of you are curious, here's a pic of the info tag from the heater.
With winter coming and I'm sure most of you breaking out the heaters, I thought this might interest a few of the guys on here.
Notice the bailing wire tied to the ends of the handle. The rod just slipped into the ends but because of the heater's weight, the sheet metal shroud would flex and the rod would pop right out. Also the screws holding the upper shroud half onto the lower were mismatched sheet metal screws that barely held the halves together.


Dusty, nasty, and I didn't get a decent pic, but alot of the wiring inside was beat up badly, with exposed strands and chafed insulation. The cord itself was nearly half wrapped with old gummy electrical tape. At a glance I counted half a dozen chafed/exposed spots, along with the ground pin missing from the plug. Had I known it was this bad (with the exception of the missing ground pin) I wouldn't have used it through last Winter. Yeek. The intake filter was barely hanging on too.

It ran fine while I used it. Got curious and tried a couple gallons of ULSD in it to see how the odor would be compared to the kero. BLARGH. Horrid. The kero was unpleasant enough, and I found what was most tolerable was the Klean Heat kero alternative that Klean Strip makes.
This year when the weather started cooling off I took the opportunity to clean up the heater and fix the gnarly wiring. I figured while it's apart it'd be wise to go ahead and overhaul it and fix anything else that might be bad.
The rear cover plate after cleaning. No clue what the purpose of the drain plug is. The adjusting screw I found out controls the air going through the fuel pickup siphon, controlling the mixture. It was cranked down hard with solid buildup underneath and all gummed up with old thread sealer. The brass fitting is where the air is pumped out through the system to the fuel siphon.

Underneath the cover plate. Turned out all that black buildup was just dust from the rotor vanes in the air pump. Quick scrub in my solvent tank cleaned it right up.

The rotor and stator vanes. There was lots of tightly packed dust built up in here. The rotor itself was only held in by a spring clip so I was able to clean that in the tank. Vanes got hand cleaned with a solvent-soaked rag and the inside of the housing/ring got cleaned out with rags and Q tips. Curious what pressure and overall CFM this little guy pushes through the siphon.

The rear plate cleaned up and reassembled. The filter that was there crumbled to dust in my hand, so I got a pair of Scotch Brite pads and cut them to match the filter enclosure. The thickness of the two pads was a perfect fit for the intake. Probably filters better than the old element too

The motor/pump/fan/ignition assembly cleaned up, rewired and reassembled. Pretty much everything got hand cleaned either in the solvent tank or with several healthy blasts of electrical contact cleaner.

Closer pic of the wiring. A lot of it just got replaced. Luckily I have a bunch of old 16AWG cords with ground leads so I was able to easily replace the old beat up one.

I thought this was kind of interesting on an older heater. I would expect a new one to use a safety mechanism, but was surprised to see one on an old unit. From what I can tell by the way it's wired, this photoresistor (which mounts on the back of the combustion chamber facing the flame) continually drops its resistance if there isn't constant exposure to light, which allows more and more current to pass through the breaker until it pops. Not bad to prevent flooding of the chamber if the flame happens to go out (only had that happen when it's run out of fuel, both before and after overhauling it).

Start relay for the motor. First time I had seen one like this, but apparently this style isn't uncommon. It was caked with dust and greasy crud, so it ended up getting almost half a can of contact cleaner.

Heater reassembled after cleanup. I put a couple large fender washers under the handle ends and used a couple screws with acorn nuts to secure them to the bar. Solid as a rock now. Since they were small enough to fit in my toaster oven I painted and baked them. The shroud halves and tank will likely be done in the Summer. The weather was cooling off fast here and I didn't have time to wait for a good cure without the help of an oven.

Nice & toasty! Before overhauling it, the nose of the combustion chamber wouldn't glow at all. I didn't realize just how much heat this could crank out (can't really tell BTUs by feel) until I got it all cleaned up and got the mixture dialed in right. I also gave the strainer screen in the fuel pickup a good cleaning since it was nearly completely clogged with little bit of gunk and rust. Looks like next Summer I'll be flushing out the tank with some muriatic acid and putting some sort of coating material in it. But with everything clean and tuned up it works FAR better now. A little quieter, NO more stink with kero, lights off instantly now and of course, I'm getting a lot more heat output for the fuel used.

I had a couple gallons of WVO that I had been starting to save up for a waste oil heater project that got 86'd in favor of a rocket stove, so I got curious and mixed some into a few gallons of kero at an 80:20 ratio. Worked great and made my shop smell like fried chicken (I certainly wasn't complaining), but after running just less than a full tank (five gallons) of the mixture through, the heater was having trouble lighting. I still had between a quart and half a gallon in the tank so I pulled the upper shroud and took a look into the combustion chamber and it looked like the nozzle was having trouble getting a constant mixture of air & fuel through. So I pulled the chamber, cleaned out the nozzle and put a couple gallons of diesel (all I had handy) in to further dilute down the WVO in the mixture. It's working great again, and even though the smell was still noticeable it was FAR less noxious than before the overhaul. With the addition of a couple ounces of isopropyl alcohol per gallon of diesel to lower the flashpoint a bit and get a more complete burn, it was actually better than even the Klean Heat kero was burning before the overhaul. I might give a couple gallons of pure diesel a try again with the alcohol added and see how that does. If I don't like it, at least now I know that I can go back to the (expensive) Klean Heat kero and have no noticeable smell at all.
In case any of you are curious, here's a pic of the info tag from the heater.

With winter coming and I'm sure most of you breaking out the heaters, I thought this might interest a few of the guys on here.


 'MURICA