|
|
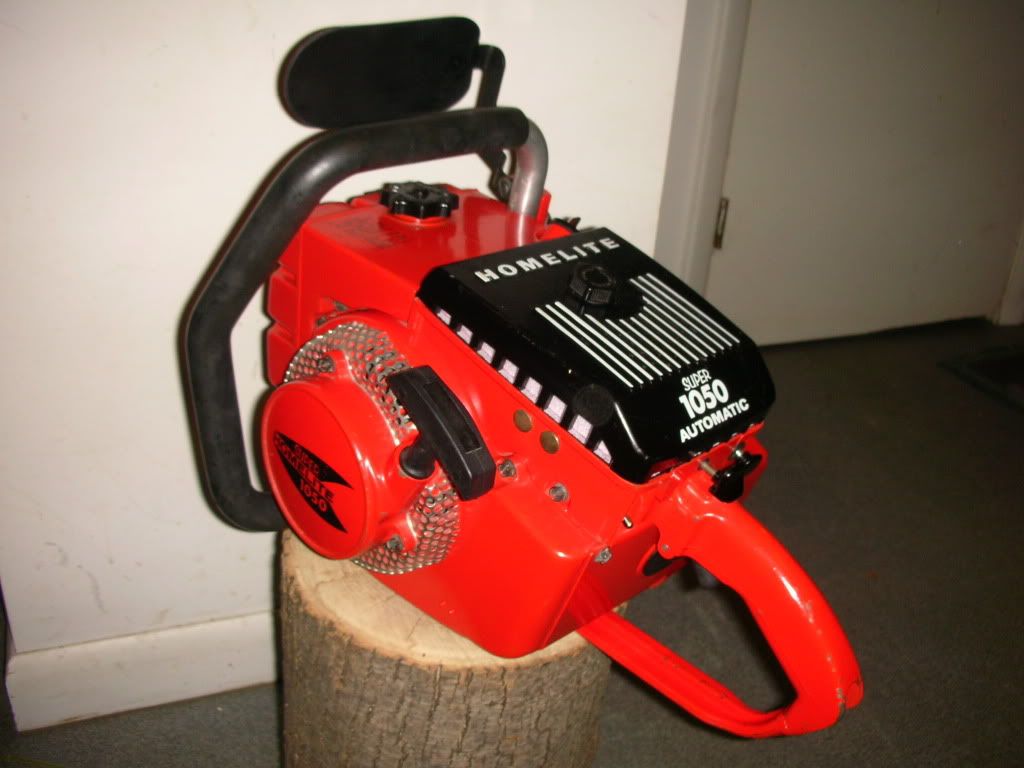
Post by lesorubcheek on Jun 26, 2012 20:31:22 GMT -5
There's been a few different variations for the front handle mount on the 7/8/900 series. For the upper attachment point, some use shoulder bolts and may have a rubber pad similar to what's on a Super EZ. This one is pretty simple with just a plate and two screws. 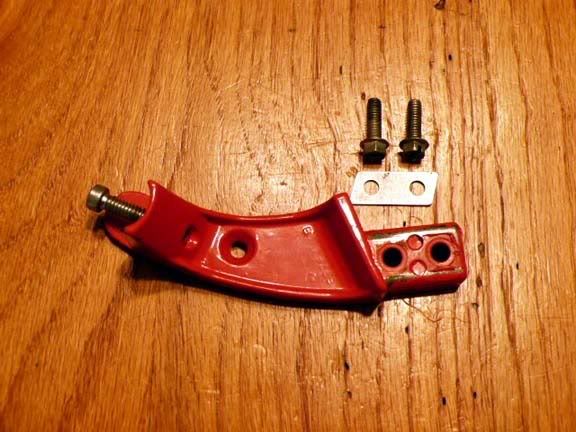 Sit the plate into place. 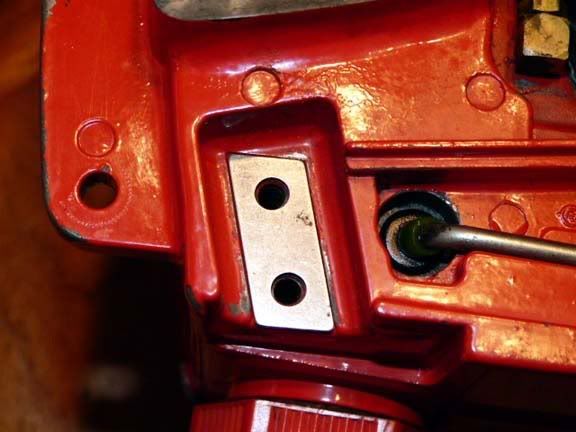 and bolt it down. 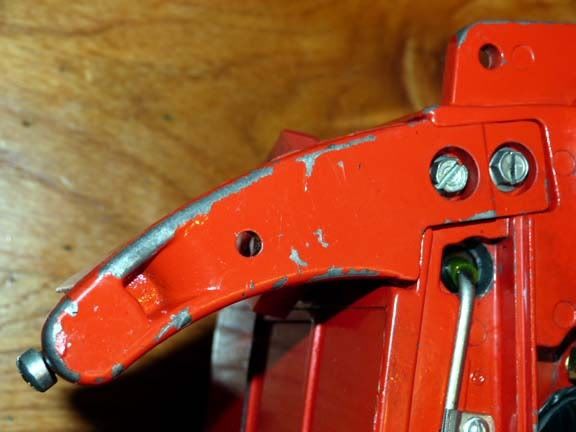 The bottom mount uses a plate, rubber spacer, 2 grommets and 2 shoulder screws. 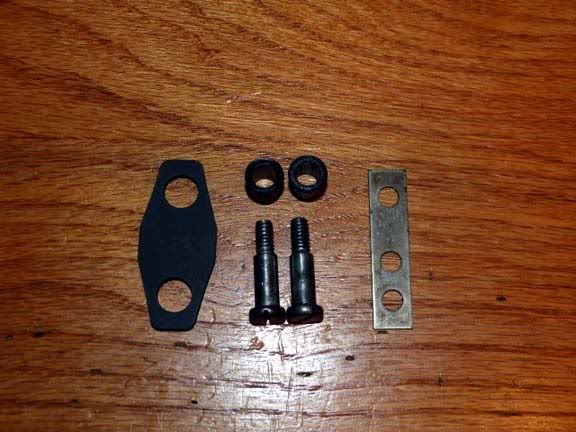 Sit the plate into position first. 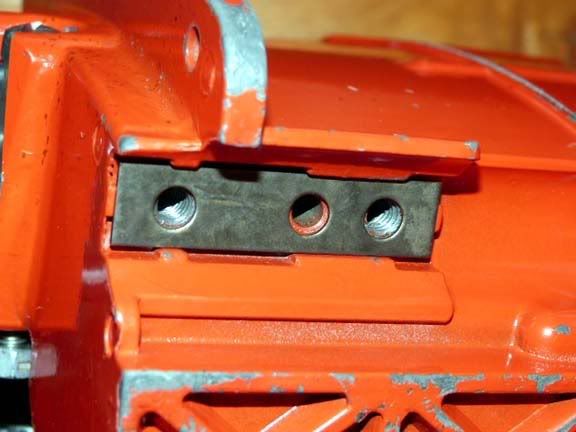 The rubber spacer will sit on top of the metal plate. Install the 2 rubber grommets into the handle bar. 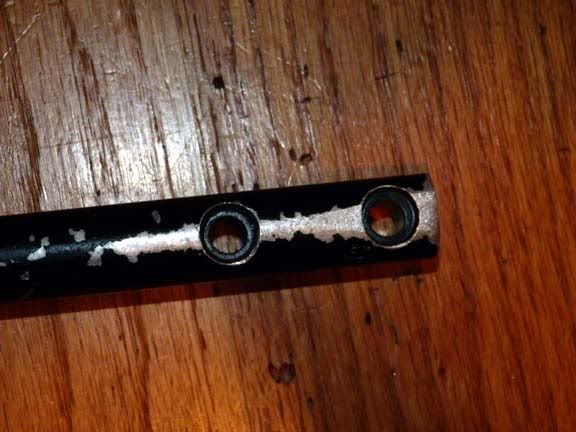 Slide the bar from the side, line everything up and bolt it down. Two shoulder screws on the bottom and one screw up top. Thought I'd show the duckbills while I was at it. Here's the fuel cap. 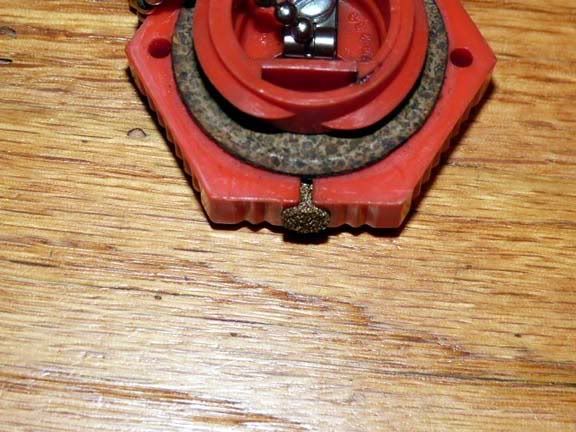 Remove the brass sintered plug and you'll probably find a glob of melted rubber goop. This one came out fairly intact without smearing too bad. Alcohol is great to clean this stuff. 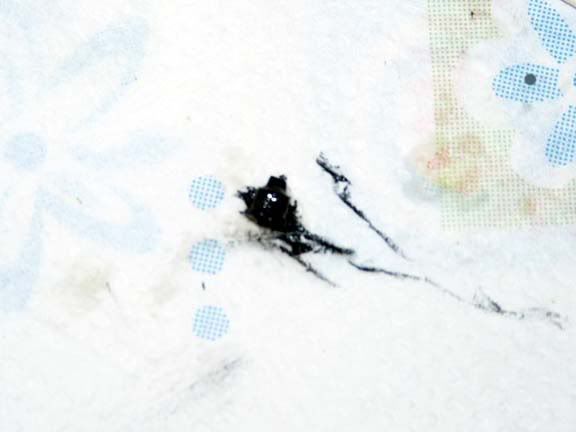 Here's the way the duckbill fits in. Just drop it into the opening, lips inward and then press the bronze plug back in over it. 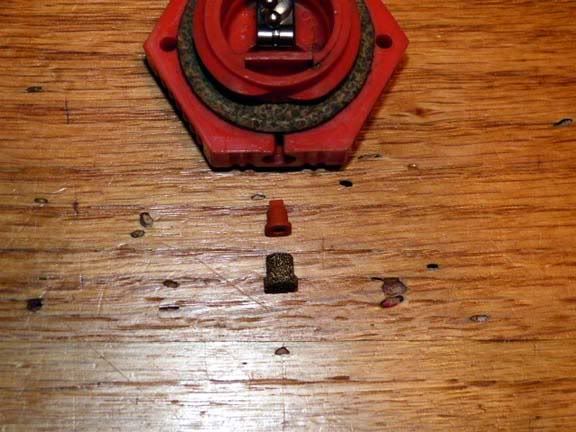 The oil cap is arranged a little differently, but uses a duckbill the same way. Twist and pull the metal tube up from the cap and the duckbill sits inside. There's the parts in order to go back. 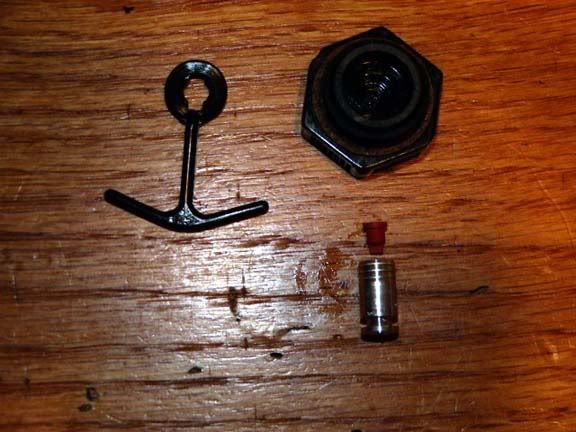 The lip here points into the opening of the metal tube. You can barely see the lips inside the tube pointing up in the pic. 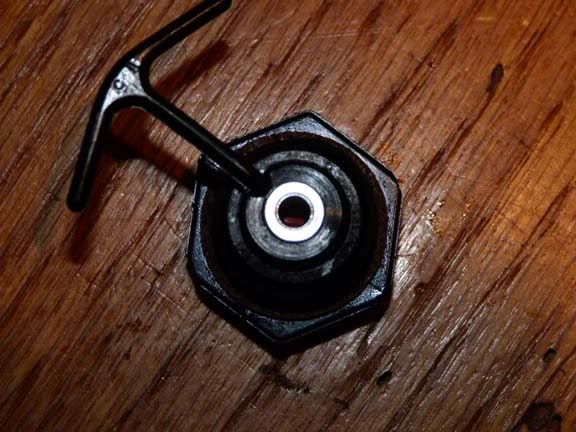 Not too much left now. Hopefully one more round will wrap it up. |
|
|
|
Post by Brian VT on Jun 27, 2012 6:51:48 GMT -5
I'm looking forward to hearing it growl and maybe see it throw some chips.
|
|
|
|
Post by lesorubcheek on Jun 27, 2012 20:22:17 GMT -5
Brian, I was hoping to hear some growling this afternoon also.... but as I feared, the carb was running extremely rich. Couldn't get any richer if it won the powerball lottery! Looks like its going to require some additional attention. I was hoping I wouldn't have to mess with the governor since I've already just about stripped the slot to get it out, but now it looks like no other choice. Only good thing it all the smoke ran the mosquitoes away, at least for a little while.
Dan
|
|
|
|
Post by lesorubcheek on Jun 27, 2012 21:22:39 GMT -5
There's still some hope... for the carb at least, for my brain, I think all hope is lost. A quick inspection and I had the needle lever set incorrectly. Its supposed to be even with the base of the floor of the carb. Naturally, I had set it level to the outer edge.  . Maybe tomorrow will be a better day. Hopefully the governor can remain intact after all. Dan |
|
|
|
Post by Brian VT on Jun 27, 2012 21:38:36 GMT -5
There's still some hope...A quick inspection and I had the needle lever set incorrectly. Dan That's good news ! All will be fine tomorrow. Get a good night's sleep and take care of that brain. You never know when you might need it. lol |
|
|
|
Post by lesorubcheek on Jun 28, 2012 19:53:50 GMT -5
Finally got it together this afternoon and threw a dull chain on to see if it would run. Looks like the carb is going to be OK. Not much in the yard to cut but this short pine log, but it's better than nothing. Again, apologies for the extremely dull chain, but just don't have time right now to get all the ducks in a row. I'm new at doing videos, and not sure how to imbed the vid, but I think this will at least insert the link over at photobucket so you can click and see it. 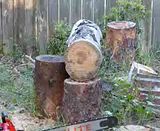 Dan |
|
|
|
Post by tommyhnavix on Jun 28, 2012 20:11:11 GMT -5
A great job  Sounds like a brand new machine. Great pictures and video!! Look forward to your next project. Tom |
|
|
|
Post by Brian VT on Jun 28, 2012 20:12:50 GMT -5
Fantastic !!!! Nice job. Sounds great. I even plugged my speakers in and played it a few more times. Love it.  |
|
|
|
Post by lesorubcheek on Jun 29, 2012 17:35:20 GMT -5
Thanks Tom, Brian... sad thing now is it'll be at least 4 months before it'll be even close to cool enough outdoors to really use it! Supposed to be ~ 100, even close to the coastline tomorrow. All the fun trees are at the farm up in Alabama, and it'll be even hotter there. Plenty of time to have some more fun fixing a few more up though!
Dan
|
|
|
|
Post by leec12 on Sept 11, 2012 20:11:04 GMT -5
Thank you so much, I just picked up a 923 and will find this very useful
Lee
PS where is the link to the video?
|
|
|
|
Post by my600ho on Sept 12, 2012 8:36:51 GMT -5
Awsome write up. Something i would like to do to mine some day.
|
|
|
|
Post by lesorubcheek on Sept 18, 2012 18:47:17 GMT -5
Thank you so much, I just picked up a 923 and will find this very useful Lee PS where is the link to the video? Best of luck with the 923 Lee. One of the best series of Homelites ever IMHO. Just click on the pic with the log and it'll open up a video... I couldn't figure out a way to imbed it in the post. Dan |
|
AlvinFlynt
Collector
 Get it done.. and.. F A S T !
Posts: 55
|
Post by AlvinFlynt on Mar 24, 2013 20:34:01 GMT -5
Dan.. I know this post is old but you seem to have good experience with the 925. Having trouble with clutch cover clearance. Wants to rub the 7/16 bolt heads on the back of the cover. Seems like every thing went back together right. Any ideas or fixes?
|
|
|
|
Post by sweepleader on Sept 17, 2013 13:02:21 GMT -5
This is a great piece of work!! All the details! Very nice. I seriously hate to criticize this thread but I have to in order to ease my conscience. I would suggest that brass or copper wire would be better substituted for the cotter just in case. Steel is not what I would want sucked into the crankcase with the working parts if the wire should come loose. I know the odds are small but I have seen the damage done to engines with steel parts sucked in through the carb, it is not pretty. After all this work and time, what a shame it would be to mess up the crank or piston for a tiny piece of wire.
Thanks again for posting this, so much can be applied to any saw that everyone should read this. Lots of smiling!
|
|
|
|
Post by lesorubcheek on Sept 17, 2013 16:47:00 GMT -5
Thanks very much, and, you're absolutely right about the steel. I've read this before on other forums, and really should pick up on the potential danger by now, but seems a little slow sinking through this old skull. Next time we visit a craft store, I'm going to have to remember to look for some brass wire. It's a precaution that makes perfect sense. Still wish there was source for the original brass cotter pins. It's a mystery why this size is so hard to find.
Dan
|
|
|
|
Post by sweepleader on Sept 18, 2013 12:08:37 GMT -5
I too have looked in vain for those cotter pins, I found a source but they will only sell in 1,000 piece lots! You are lucky to have even a few on hand. Craft stores seem to only have brass wire in smaller gauges, like 22 or 28, when 20g is about .030 and similar to the .032 that matches the 1/32 cotters. I have settled on stripping stranded electrical wire and using copper in place of brass.
The reason this thread caught my eye is the XL98 I have that needs a lot of work. It would seem to be the same except for mine has no oiler, a different clutch (v-belt, no chain) and a huge air filter to catch the cutting dust. Mine is in much poorer shape appearance wise, beyond painting, but it will run again and cut again some day.
Thanks again for this thread, very interesting read.
Dan
|
|
AlvinFlynt
Collector
Get it done.. and.. F A S T !
Posts: 55
|
Post by AlvinFlynt on Oct 1, 2013 20:59:32 GMT -5
Can any of you tell me how the carb governor works on a SXL 925? I have just rebuilt the carb on one and the low (l) circuit works fine but the high (h) won't let me lean out much to see where I'm at sound wise. Of course I would bring back to slightly blubbering to the rich once I've leaned out. Any ideas? Is the governor preventing this?
|
|
|
|
Post by lesorubcheek on Oct 8, 2013 8:06:56 GMT -5
Hi Alvin. I think someone posted a few years back the info sheet that went along with the 151 carb that described the governor's operation. Just not sure where it is at the moment. What you're describing sounds very much like normal behaviour with this carb. I can't remember the exact physics used with the governor. It's a small ball or bead held with spring tension on its seat. Something, either resonant frequency or amount of vac or pressure or some other physical property, causes it to unseat when at it's preset limit. When unseated it allows extra fuel to richen the mix. To bypass the governor, you can remove it, cut a small thin disk out of brass or other soft metal and plug the end so the passage is always closed. As long as it's working correctly though and not running too rich in the cut, personally I think it's fine.
Dan
|
|
|
|
Post by lesorubcheek on Oct 8, 2013 8:13:31 GMT -5
|
|
AlvinFlynt
Collector
Get it done.. and.. F A S T !
Posts: 55
|
Post by AlvinFlynt on Oct 12, 2013 18:59:40 GMT -5
Thanks guys! I just got a new bar and chain for it and will see how it cuts. That will be the real test. Personally I don't believe anything is wrong either since the carb/kit went together perfectly and the needles or seats are not goofed up. Regards, Alvin
|
|